Pulpy Orange Honey Lemonade


It was a surprise when my son demanded for orange juice today. I decided to make it as a lemonade version with no sugar. I used navel oranges but you use any variety of orange for the same 

Ingredients:
  1. Navel oranges - 2
  2. Lemon - 1/4
  3. Honey - 2 Tablespoons
  4. Salt - a pinch 
  5. Water - 1/2 cup

Preparation:
  1. Peel the orange skin and add  orange slices to the juicer
  2. Squeeze lemon juice into the juicer
  3. Add water, honey and salt
  4. Run the juicer in liquidify mode for 2 minutes
Enjoy your Orange Honey Lemonade. Do not filter to enjoy it with pulp


Note:
  • You can use ice cubes if you like it to be cold
  • If you don’t have a juicer you can use a regular mixer with juice jar 

Pasta in two styles

It was a Friday Dinner time and I thought of making Pasta, that is when one voice at home says "I need a cheesy version" and other says "I need it spicy". This became my motivation for cooking that evening and also restart my blogging again in 2020 :).

Cheesy Carrot, Spinach Italian Style 
Ingredients:
1. Pasta - I used Penne for this recipe. You can chose any style you like - 1 cup
2. Carrot - 1 
3. Tomato - 1/2
4. Garlic - 1 clove finely chopped
5. Spinach - 1/2 cup
6. Milk - 1/4 cup
7. Salt - to taste
8. Olive oil - 2 tablespoon
9. Butter - 1 tablespoon
10. Italian spice mix - 1/2 tablespoon
11. Grated Cheese - 1/4 cup


Preparation

  1. Boil 2 cups of water, add little salt and few drops of olive oil, add pasta and cook for 5 to 6 minutes and strain the water
  2. Grind carrots, tomato, garlic into a coarse paste
  3. Heat butter and olive oil in a pan and add the ground paste
  4. When it starts cooking and the raw smell leaves, add milk and continue cooking in medium flame
  5. When the sauce starts to thicken, reduce to low flame and add the herb mix and salt and the roughly chopped spinach
  6. Cook for another 2 to 3 minutes and add the pasta and cheese and mix well to coat the sauce
Yummy cheesy carrot spinach pasta is ready to serve hot... Do not shy out to add more cheese :)


Carrot, Spinach Indian Style 
Ingredients:
1. Pasta - I used Penne for this recipe. You can chose any style you like - 1 cup
2. Carrot - 1 
3. Tomato - 1/2
4. Garlic - 1 clove finely chopped
5. Spinach - 1/2 cup
6. Onion - 1/4 cup chopped 
7. Salt - to taste
8. Olive oil - 2 tablespoon
9. Red chilly powder - 1/2 tablespoon
10. Coriander powder - 1/4 tablespoon
11. Garam masala - a pinch
12. Pepper powder - a pinch
13. Turmeric powder -a pinch

Preparation

  1. Boil 2 cups of water, add little salt and few drops of olive oil, add pasta and cook for 5 to 6 minutes and strain the water
  2. Grind carrots, tomato, garlic and spinach into a coarse paste
  3. Heat olive oil in a pan and add chopped onion and saute it for 2 minutes
  4. Add the ground paste and cook for 5 minutes in a medium flame
  5. Add red chilly powder, coriander powder, turmeric powder and salt and cook the sauce until the raw smell leaves
  6. Add garam masala, pepper powder & pasta and mix with the sauce well
  7. Cook for 5 minutes in low flame
Hot spicy Carrot, Spinach pasta is ready to serve.

Upma Kozhukattai (Steamed rice balls)


Here is a simple and healthy breakfast/dinner recipe.

Ingredients:
1. Idly rava - 1 cup
2. Oil - 2 tablespoons
3. Urad dhal - 1 teaspoon
4. Channa dhal - 1 teaspoon
5. Asafoetida - a pinch
6. Red chilies - 2 to 3 
7. Grated coconut - 2 tablespoons
8. Salt - to taste
9. Curry leaves - 5 to 6
10. Mustard seeds - 1/2 teaspoon


Preparation:
1. Heat oil in a pan and season it with mustard seeds
2. Once it splutters, add urad dhal, channa dhal and fry well until it turns golden brown
3. Add hing, red sillies, curry leaves, grated coconuts and saute for couple of minutes
4. Add 3 cups of water and required salt and bring it to boil
5. Once the water boils well, simmer the stove and add the idly rava slowly and keep mixing. At this stage, it is likely to form lumps, so you need to mix continuously
6. Once the rava is cooked nicely switch off the store. Now the upma is ready. You can have this as a dish by itself
7. Now let this cool completely
8. For the next step, fill the idly cooker with about 1 inch of water and bring it to the stove
9. Meanwhile start making small balls with the upma and place them on the idly plates and steam it for about 5 to 6 minutes
10. Remove it from the flame and serve it hot with any chutney


Tips:
1. You can dry roast idly rava for 3 to 4 minutes in little oil to make it cook faster
2. Once you make the upma kozhukattai, you can dust them in idly podi for additional flavor

Adai

My mom prepares adai in a different way but I learnt this version of adai recipe from my mother-in-law. Adai is one of the best dishes that has lot of protein content. You can have this for breakfast or dinner. Aviyal is one of the best side dish for Adai. Alternatively, you can also have any chutneys as a side dish.

Ingredients:
1. Boiled rice - 1/2 cup
2. Raw rice - 1/2 cup
3. Toor dhal - 1/4 cup
4. Bengal gram dhal - 1/4 cup
5. Moong dhal - a handful
6. Urad dhal - 1 tablespoon
7. Red chillies - 6 to 8
8. Garlic - 10 pods
9. Fennel seeds - 1 teaspoon
10. Salt - to taste
11. Hing - a pinch
12. Chopped onions
13. Chopped curry leaves
14. Chopped ginger
15. Coarsely ground pepper and cumin seeds
16. Oil - to fry


Preparation:
1. Soak rice and dhals together for around 2 hours
2. Coarse grind with garlic and fennel seeds
3. You can let it ferment for couple of hours or make adai instantly
4. When you are ready to make adai, prepare finely chopped onions, curry leave, chopped ginger and add it to the adai batter
5. Make a coarse powder of pepper and cumin seeds and fry it in less than a teaspoon of oil and add it to the batter
6. Add finely chopped coriander leaves to the batter and you are ready to made the adai 
7. Heat a dosa tava and make the adai like you prepare dosa

Tips:
1. You can use finely chopped drumstick leaves in the batter
2. You can avoid garlic if you don't like it 
3. You can use the same batter in the kuzhi paniyaram pan to make Kara Paniyaram
4. This batter can be refrigerated and can be used up to a week

Paneer Kurma

A simple and quick recipe with Paneer that will go well with both rice and chapathis/rotis.

Ingredients:
1. Paneer - 1 pack chopped into cubes
2. Onions - 1/2 cup (chopped thin slices)
3. Tomato - 1/2 cup (chopped finely)
4. Bay leaves - 2 to 3
5. Cinnamon - a small stick
6. Cloves - 3 to 4
7. Cardamom - 1
8. Coconut - 1/4 cup
9. Peppercorns - 5 to 6
10. Red chilly powder - 1 tablespoon
11. Salt - to taste
12. Oil - 2 tablespoon
13. Turmeric powder - 1/4 teaspoon
14. Ginger garlic paste - 1/2 tablespoon


Preparation:
1. Heat 1 tablespoon of oil and shallow fry the paneer cubes for 4 to 5 minutes in medium flame. 
2. Prepare hot water of 2 cups and once the paneer turns golden brown, drop it in the hot water. This process will keep the paneer soft
3. Add the remaining oil in the same pan and season with bay leaves and onions
4. Once the onions turn translucent, add ginger/garlic paste and fry well
5. When the raw smell leaves, add tomatoes and saute for another 2 to 3 minutes
6. Add all spices - turmeric powder, red chilly powder and salt and mix well
7. Saute for another 2 to 3 minutes and add the fried paneer and mix it with the masala
8. Add the hot water that the paneer was soaked in and bring it to boil for 5 minutes
9. Meanwhile prepare the paste with coconut, cloves, cinnamon, peppercorns and cardamon
10. Add this paste to the mixture and cook in low flame for 5 to 6 minutes 

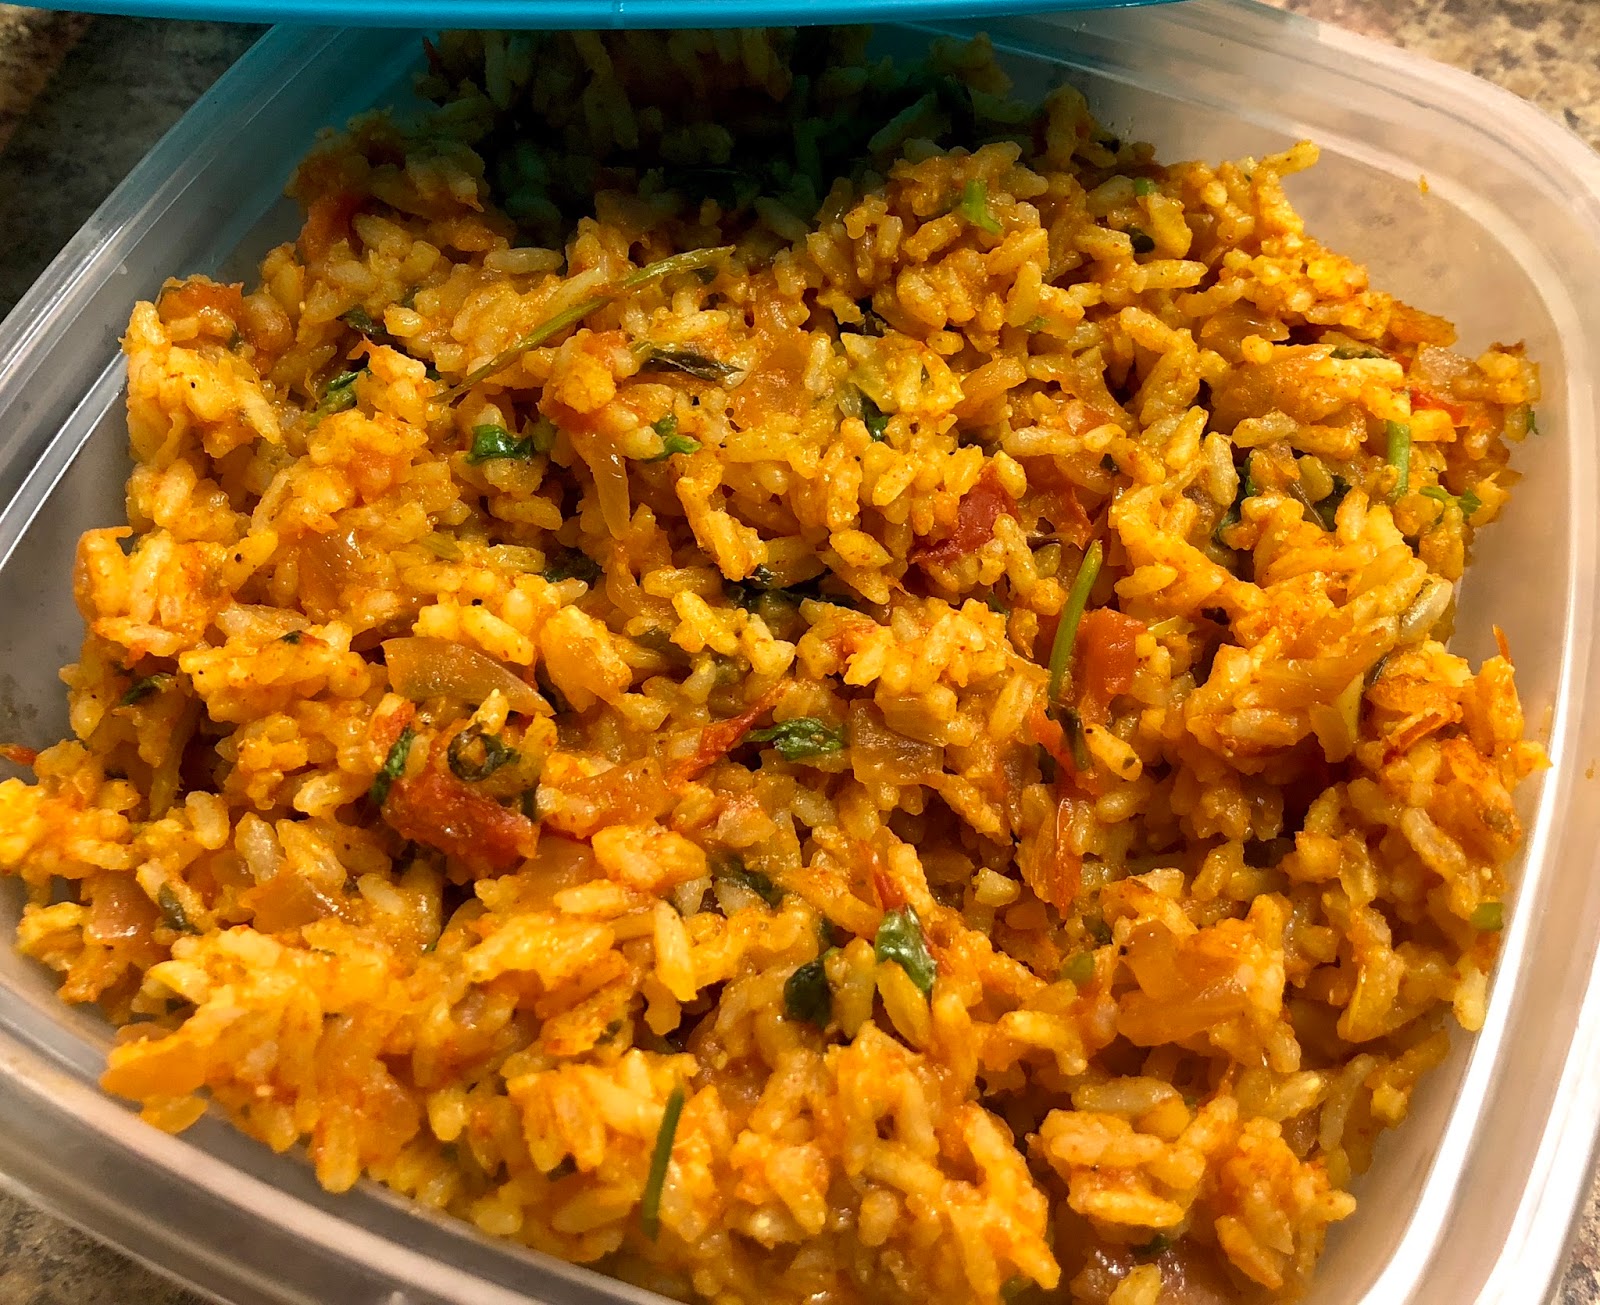
Garnish with coriander leaves and serve it hot. 


Tips:
1. You can use poppy seeds/cashews to grind the paste thick
2. Add mint leaves while grinding or seasoning for additional flavor
3. Skip the frying process of Paneer if you like to avoid more oil
4. I used green peas as my son loves them, this is optional

Chicken Curry


I stopped eating Non-vegetarian over 5 years ago and so I had not cooked much of non-veg as well since then. However, I decided to resume cooking of Non-veg again for my husband recently. One of my friends was coming craving for chicken, so I wanted to try something new and flavorful and this chicken curry is the outcome of that experiment :).

Preparation Time: 1 hour Cooking Time: 30 minutes

Ingredients:
1. Chicken - 2 pounds
2. Red chilly powder - 1 to 1 1/2 tablespoon
3. Coriander powder - 1 tablespoon
4. Yogurt (Curd)- 2 tablespoon
5. Garam masala - 1/2 teaspoon
6. Mint leaves - 6 to 8
7. Coriander leaves - 15 to 20 strands
8. Green chilies - 2
9. Salt - to taste
10. Lemon juice - 1 teaspoon
11. Ginger Garlic paste - 1/2 teaspoon
12. Turmeric powder - 1/4 teaspoon
13. Oil - 6 to 7 tablespoon
14. Curry leaves - 8 to 10
15. Onion - finely chopped 1 cup


Preparation:
1. Make a wet paste with Mint leaves, coriander leaves and green chilies
2. Clean chicken and add all the ingredients (except oil, curry leaves and onion) and the ground paste and mix it well
3. Refrigerate the marinated chicken for atleast an hour. (This time when I made this dish, I left the marination for 6 hours)
4. Bring the chicken to room temperature before you start cooking
5. Heat oil in pan and add curry leaves and onions and saute well
6. Once onion becomes translucent, add the marinated chicken mixture and mix well
7. Close the pan with lid and start cooking in medium flame for 20 to 25 minutes. You can add small quantity of water (if required as the chicken mixture will start leaving water as we have added yogurt during marination)
8. You will start seeing the masala getting nicely coated on the chicken and also the oil leaving out. At this stage check the chicken must also have got cooked nicely (if not continue cooking for another 5 to 6 minutes in a low flame)

Chicken curry is ready to be served. I made this more as a thokku/masala style that can be had with Roti/chapathi or rice. However, if you want this to be like a semi gravy you can add some water to adjust the consistency of the curry. 

Tips:
1. Alter the quantity of green chilies and chilly powder according to your spice level
2. Use Kashmiri red chilly powder for extra flavor 
3. The same recipe can be made with potato or paneer for vegetarians like me :)

Radish Greens Poriyal


I try my best to include greens in our menu atleast twice a week. Also, I have the anxiety to try out different greens and this is one such experiment made out of radish greens. I visited whole foods for my grocery shopping and the small radish bunches with fresh greens on it caught my eyes and I grabbed them. I have cooked radish greens before and made curry with peanuts ( I will try to share this recipe later), but this is a attempt with a different flavor. Hope you like it.

Preparation Time: 10 minutes Cooking Time: 15 minutes

Ingredients:
1. Radish greens - finely chopped - 1 1/2 cups
2. Onions - finely chopped - 1/4 cup
3. Oil - 1/2 tablespoon
4. Mustard seeds - 1/2 teaspoon
5. Curry leaves - 5 to 6
6. Cumin seeds - 1/2 teaspoon
7. Salt - to taste

To Grind:
1.  Coconut - 3 to 4 tablespoon
2. Turmeric powder - a pinch
3. Garlic pods - 2 
4. Red chilies - 1 to 2 (depending on your spice level)


Preparation: 
1. Heat oil in a pan and add mustard seeds, when it splutters add cumin seeds and onions and saute until onion becomes translucent
2. Now add the radish greens ( i used only leaves and discarded the stems) and stir well and cook it for 3 to 4 minutes
3. Meanwhile dry grind all ingredients given under 'to grind'. Do not add water
4. Add the ground mixture and required salt to the pan and mix well
5. Sprinkle few drops of water and close the pan and cook in slow flame for 7 to 8 minutes until the raw smell goes away

Radish greens is ready to be served and it goes well with Sambhar or Rasam rice.

Tips:
1. You can avoid garlic if you don't like the flavor
2. Instead of seasoning cumin seeds, you can grind it along with the other ingredients
3. Use small onions (shallots) for additional flavor

Lemon Ginger Rasam

Here I share the recipe of Lemon rasam, one of my favorites. The specialty of this rasam is that it does not require any rasam powder. Green chillies and ginger gives it the required flavor.

Preparation Time: 5 mins Cooking Time: 20 mins

Ingredients:
1. Toor dhal - 3 Tablespoon
2. Green chilies - 2
3. Ginger - 1/2 inch
4. Tomato - 2 
5. Lemon juice - 2 tablespoon
6. Salt - to taste
7. Oil - 1 tablespoon
8. Mustard seeds - 1/2 teaspoon
9. Curry leaves - 5 to 6
10. Coriander leaves
11. Red chilies - 2 
12.Turmeric powder - 1/4 teaspoon
13. Asafoetida - a pinch


Preparation:
1. Pressure cook toor dhal , smash nicely, add water and prepare 2 cups of dhal water
2. In a pan, add chopped tomatoes, slit green chilies, grated ginger, turmeric powder, salt, curry leaves and 5 to 7 strands of the coriander leaves (finely chopped)  and 1 cup of water and bring it to boil
3. Once the tomatoes cook  (takes approximately 4 to 5 minutes), add the dhal water and continue to boil for another 3 to 4 minutes
4. In another pan, heat oil and season with mustard seeds, red chilies, asafoetida and add it to the rasam pan
5. Add finely chopped coriander leaves (5 to 7 strands) to the rasam and remove it from the stove
6. Add lemon juice to the rasam and it is ready to be served


Tips:
1. You can use Ghee instead of oil for seasoning


Chow Chow kootu - Version 2

I already have posted a version of chow chow kootu earlier, but this one has a slight variation and flavor. 

Preparation Time: 15 mins Cooking time: 30 mins

Ingredients:
1. Chow chow (Chayote) - 1
2. Moong dhal - 1/4 cup
3. Onion - finely chopped - 1/4 cup
4. Tomato - finely chopped - 1/4 cup
5. Salt - to taste
6. Turmeric powder - 1/4 teaspoon
To Grind:
1. Coconut - 5 tablespoon
2. Cumin seeds - 1/2 teaspoon
3. Red chilies - 1 ( I used a long red chilly so one was enough, if using smaller ones you can use 2 or alter according to your spice preference)
4. Peppercorns - 5 to 6
To Temper:
1. Oil - 2 tablespoon
2. Mustard seeds - 1 teaspoon
3. Curry leaves - 5 to 6
4. Asafoetida - pinch


Preparation:
1. Wash and soak Moong dhal for 15 minutes
2. Cut chow chow into small pieces and finely chop onion and tomato
3. In a pressure cooker, add the cut vegetables, moong dhal, turmeric powder, salt and water (vegetables and dhal should soak in water)
4. Leave it for 3 whistles
5. Grind the ingredients given under 'to grind' into a paste with little water
6. Once the pressure comes down, open the cooker and add the ground paste and bring it to boil (approximately takes 5 to 6 minutes). You may adjust the consistency of the kootu at this stage by adding water
7. Now prepare the seasoning - heat oil in a pan, add mustard seeds and when it splutters, add asafoetida, curry leaves and red chilies
8. Add it to the kootu and switch off the stove

Chow chow kootu is ready to be served. This can be had with rice or rotis.

Tips:
1. If the kootu becomes watery, you can add 1 teaspoon of rice flour
2. You can use coconut oil for seasoning if you like coconut flavor
3. Instead of moong dhal,you can use masoor dhal

Barnyard Millet (Kudhiravali) Kichadi

I was planning to prepare a quick dinner for us but also wanted it to be healthy. So, I made an attempt to make a millet dish and sharing the recipe here

Preparation time: 10 mins Cooking time: 10 mins

Ingredients:
1. Barnyard millet - 1 cup
2. Onion - 1 medium sized
3. Tomato - 1 medium sized
4. Garlic - 6 to 7 pods
5. Green Bell pepper (capsicum) - 1/2
6. Green chilies - 1
7. Turmeric powder - 1/4 teaspoon
8. Salt - to taste
9. Ghee - 1 tablespoon
10. Oil - 1/2 tablespoon
11. Cloves - 2
12. Cinnamon - a small piece
13. Coriander leaves - for garnishing
14. Curry leaves - 2 to 3


Preparation:
1. Wash and soak the millet in water for 5 to 10 minutes
2. Meanwhile prepare the ingredients - Finely chop onions, tomatoes, bell pepper and slit green chilies
3. Heat oil in a pan and add cloves and cinnamon
4. When it splutters, add the onions, garlic, curry leaves and saute for couple of minutes
5. Add tomatoes and fry for another minute
6. Add turmeric powder, salt and cook until raw smell goes
7. Add the bell pepper and fry for another minute
8. Boil 1 1/2 cups of water separately and add it to the pan
9. Strain the millet, add it to the pan, mix it and close the pan with a lid. Keep it in a low flame for 4 to 5 minutes
10. Add Ghee and fluff the millet with a fork and switch off the stove and keep it closed with the lid for 5 to 6 minutes

Garnish with coriander leaves. Hot Barnyard millet kichadi is ready to be served. This didn't require any side dish.


Tips:
1. You can alter this recipe by adding any vegetable you like.

Tomato Rice (Version 2)

I learnt this recipe from my Mother-in-Law which is very quick and easy to make and is one of our favorite lunch box item. Any simple side dish goes along with it very well.

Preparation Time: 10 minutes Cooking Time: 20 minutes

Ingredients:
1. Rice - 1 cup
2. Onion - 1 medium size
3. Tomato - 2 medium size
4. Ginger garlic paste - 1/2 tablespoon
5. Turmeric powder - a pinch
6. Chilly powder - 1 tablespoon
7. Coriander powder - 1 tablespoon
8. Mint - 1/4 cup 
9. Coriander leaves - 1/4 cup
10. Mustard seeds - 1 teaspoon
11. Urad dhal - 1 teaspoon
12. Oil - 2 tablespoon
13. Salt - 1/2 tablespoon


Preparation:
1. Cook rice with required water (I use 2 cups of water for 1 cup rice). Make sure not to overcook it
2. Chop onions, tomatoes, mint and coriander leaves into fine pieces and keep aside
3. Heat oil in a pan and when hot, add mustard seeds. When they splutter, add urad dhal and fry to golden brown color
4. Now add the chopped onions and saute until it is translucent, you may add little salt to cook the onions at this stage
5. Add ginger garlic paste and fry until the raw smell leaves
6. Add tomatoes and half the quantity of mint and coriander leaves and continue to saute well
7. When the tomatoes are almost half cooked, add the spices (turmeric powder, chilly powder and corinader powder, salt) and cook well
8. After 4 to 5 minutes, add the cooked rice and mix it well with the masala. Keep the stove in low flame at this time
9. Once the rice is thoroughly mixed with the masala, close the pan with a lid and cook for another 2 to 3 minutes
10. Garnish with remaining mint leaves and coriander leaves and serve

This goes well with simple potato curry, vadams, chips

Tips:
1. I generally use kashmiri chilly powder to give rich color
2. I dont add salt when cooking rice. If you are using salt in the rice, adjust the quantity of salt in the masala accordingly
3. I also added half teaspoon of home made her an masala powder for some flavor
4. This recipe is made with regular rice, but if you use Basmathi rice, it gives you additional flavor and taste
5. You can try this with leftover rice as well

Ghee Rice

This is a quick lunch box lunch recipe that comes handy when you don't have any vegetables at home. This used to be my favorite food during childhood days and I loved it the way my Grandma prepares this rice for me.

Preparation Time: 10 mins Cooking Time: 20 mins

Ingredients:
1. Rice - 1.5 cups (Basmathi rice is preferred)
2. Ghee - 3 tablespoon
3. Cloves - 3
4. Cinnamon - 2 to 3 small pieces
5. Bay leaves - 2 to 3
6. Onion - 2 medium size
7. Green Chillies - 2 
8. Garlic pods - 10 to 15
9. Cashews - 8 to 10
10. Salt - to taste
11. Coconut milk - 1 cup
12. Water - 1 cup


Preparation:

1. Wash and soak Basmathi rice for 10 minutes
2. Meanwhile, chop onions into thin long slices and slit green chillies
3. If you decide to make coconut milk, grind half cup of grated coconut with 1/3rd cup of water and extract milk. If you decided to use store bought coconut milk, you can skip this step
4. Heat ghee in a pressure cooker and when hot, throw in the spices - Cloves, Cinnamon, Bay leaves
5. Add garlic, cashes, onion and green chilies and saute for a minute or two until the onions become translucent
6. Drain the water and add rice to the cooker and fry for couple of minutes. Take care not to break the rice
7. Add coconut milk and water to the rices and required amount of salt and mix
8. Close the cooker and keep it in low flame for 6 to 8 minutes and switch off the stove
9. Open the lid after you rest it for 10 to 15 minutes to let the rice get cooked in that heat. 

Fluff the rice with fork and serve it hot. Pakoda Kurma is an excellent combination for this rice. But it will also go well with other gravies


Mint Rasam

Almost after 6 years of break , I decided to renew my cooking experiments and blogging again today :). Beginning my second phase with a simple recipe.

I like to try different types of Rasam. I happened to come across the mint rasam and gave it a variation in my style. 


Preparation Time: 5 minutes Cooking Time: 15 minutes

Ingredients:

1. Mint leaves - 1/2 cup
2. Tamarind - gooseberry size
3. Dry coconut - 2 tablespoon
4. Red chilly - 2
5. Whole pepper - 1 teaspoon
6. Cumin - 1 teaspoon
7. Turmeric powder - a pinch
8. Oil - 1 tablespoon
9. Mustard seeds - 1 teaspoon
10. Curry leaves - 4 to 5
11. Jaggery - 1 teaspoon
12. Garlic - 3 to 4 pods


Preparation:
1. Soak tamarind in water and extract juice of about 3 cups. Chop garlic into fine pieces
2. Grind dry coconut with red chilies, pepper and cumin ( just for couple of seconds)
3. Wash mint leaves and add it to the mixer and make a coarse paste
4. Heat 1/2 tablespoon of oil in a pan and add the chopped garlic, ground paste and fry until raw smell goes
5. Add tamarind water, turmeric powder and salt and bring it to boil in low flame ( takes about 7 to 8 minutes)
6. Add jaggery at this stage and switch off
7. Now season mustard seeds, curry leaves and asafoetida in the remaining 1/2 tablespoon oil and add it to the rasam

Yummy mint rasam is ready to be served. This rasam will have a tangy sweet taste and goes well with any curry


Tips:
1. If you don't have dry coconut, dry roast grated coconut and use it. It gives the same flavor
2. Adjust the tamarind based on its sourness. I will recommend adding 1 cup of tamarind water first and check the taste and adjust afterwards

Some Interesting Sites